6 Simple Steps For Your In-Ground Pool Closing
For pool owners, the saddest season of the year has come: pool closing season. After the final pool festivities during Labor Day, the last thing you want to do is stress about whether or not you’ve closed your pool correctly.
That’s why we made a list of steps for closing your pool, just like we did in May for opening your pool. Just follow these six steps for proper closing, so you don’t have to worry about it over winter and can enjoy your pool for many summers to come.
1. Balance the water chemistry.
This step needs to be done 24 hours before the next steps. Using balancing chemicals, balance the pH, alkalinity level and calcium hardness. Balancing the chemicals protects the pool from scale buildup that can over the winter months. You can also shock the pool with chlorine and add algae removal products to kill all of the remaining bacteria and keep algae from growing in the water.
2. Clean the pool.
After letting the chemicals circulate for 24 hours, clean the pool like you would in a routine cleaning by vacuuming the sides and bottom of the pool and removing all floating debris. Empty out the skimmer basket. You can then remove the rails and ladders, rinse them off, lay them out to dry, and then properly store them.
3. Turn off the filter and skimmer valve.
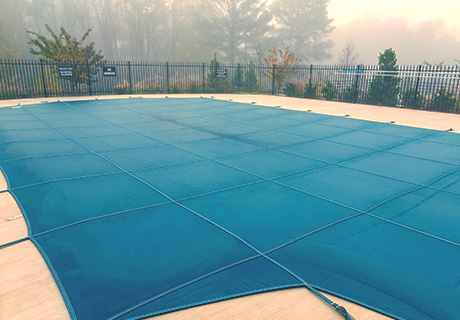
Turn the multi-port valve handle to the “backwash” position and turn the pump on to start backwashing the filter. The water level should begin to lower. It should be lowered until it is below the skimmer, as demonstrated in the picture above. If you are using a mesh cover, the water should be lowered 12 to 18 inches below the skimmer. If you are using a solid, floating cover, the water should be lowered three to six inches below the skimmer. This process should take between 30 minutes to one hour. You can then open the skimmer valve and keep the pump running until the skimmer gurgles. Once this happens, turn off the pump. Then, remove the eyeball fittings and the skimmer basket.
Note: If you’re using an automatic cover for the pool over the winter, do not drain the water level. The pool cover will not be able to support itself or anything on it, such as snow, if the water level is not at a normal operating level. This may lead to damage to the cover and prevent it from working properly.
4. Clean the filter and filter tank.
Now, you can begin to take the filter apart and clean it. To start, open the vent valve at the top of the tank. Remove the drain plug at the bottom of the tank, and water should come out quickly. Once it’s drained, take off the top of the tank. Lift the filter grids and remove them from the tank. To clean, hose them off and soak them for 12 hours in filter cleaner. A large bucket or garbage can work well as containers for soaking them. After they are cleaned and dried, you can put them back in the filter tank after you have drained and dried everything in it (next step).
5. Drain, dry and winterize the plumbing.
It’s time to drain and dry the return and skimmer lines, the pump and the chlorinator. To dry the lines, you’ll need a shop vacuum that has a blow setting. Drain the lines, then blow water out by putting the shop vacuum’s hose on top of the standing pipe. Blow air through the lines until there is just air and not water coming out. If you are worried there is still water in the lines, you can put in antifreeze to keep them from freezing. You will need about a half to one gallon of antifreeze per line. Once you have dried them and/or put in antifreeze, put winter plugs in the fittings. When doing this process with the chlorinator, remember to be careful when opening the lid and keep your face away while opening it and remove remaining sticks and tablets. Afterwards, make sure everything is turned to off or closed.
6. Finish it up.
If you have a heater for your pool, turn off the gas valve inside of the heater and close and shut off the gas line. Be sure the multi-port valve is turned to the “closed” position. If you have a solar cover, hose it off, lay it out to dry, then put back on the reel and place in storage. Add a winter chemicals kit to the pool. Install the winter cover. And you are done!
If you’re closing your pool by yourself and come across some technical difficulties, don’t get angry; closing a pool can be tricky. Just let us know by either contacting us or filling out a service request form and we’ll help you take care of it.
Article provided by wikiHow, a wiki that is building the world’s largest and highest quality how-to manual. Please edit this article and find author credits at the original wikiHow article on Close Your Swimming Pool for the Winter. Content on wikiHow can be shared under a Creative Commons License.